Beat Zelda Twilight Princess Dungeons in the Right Order
Twilight Princess is not shy about sending you across Hyrule, but its dungeon path is wonderfully strict: 9 main dungeons, completed in one set order, with each new item teaching your hands a fresh rhythm before the next major fight.
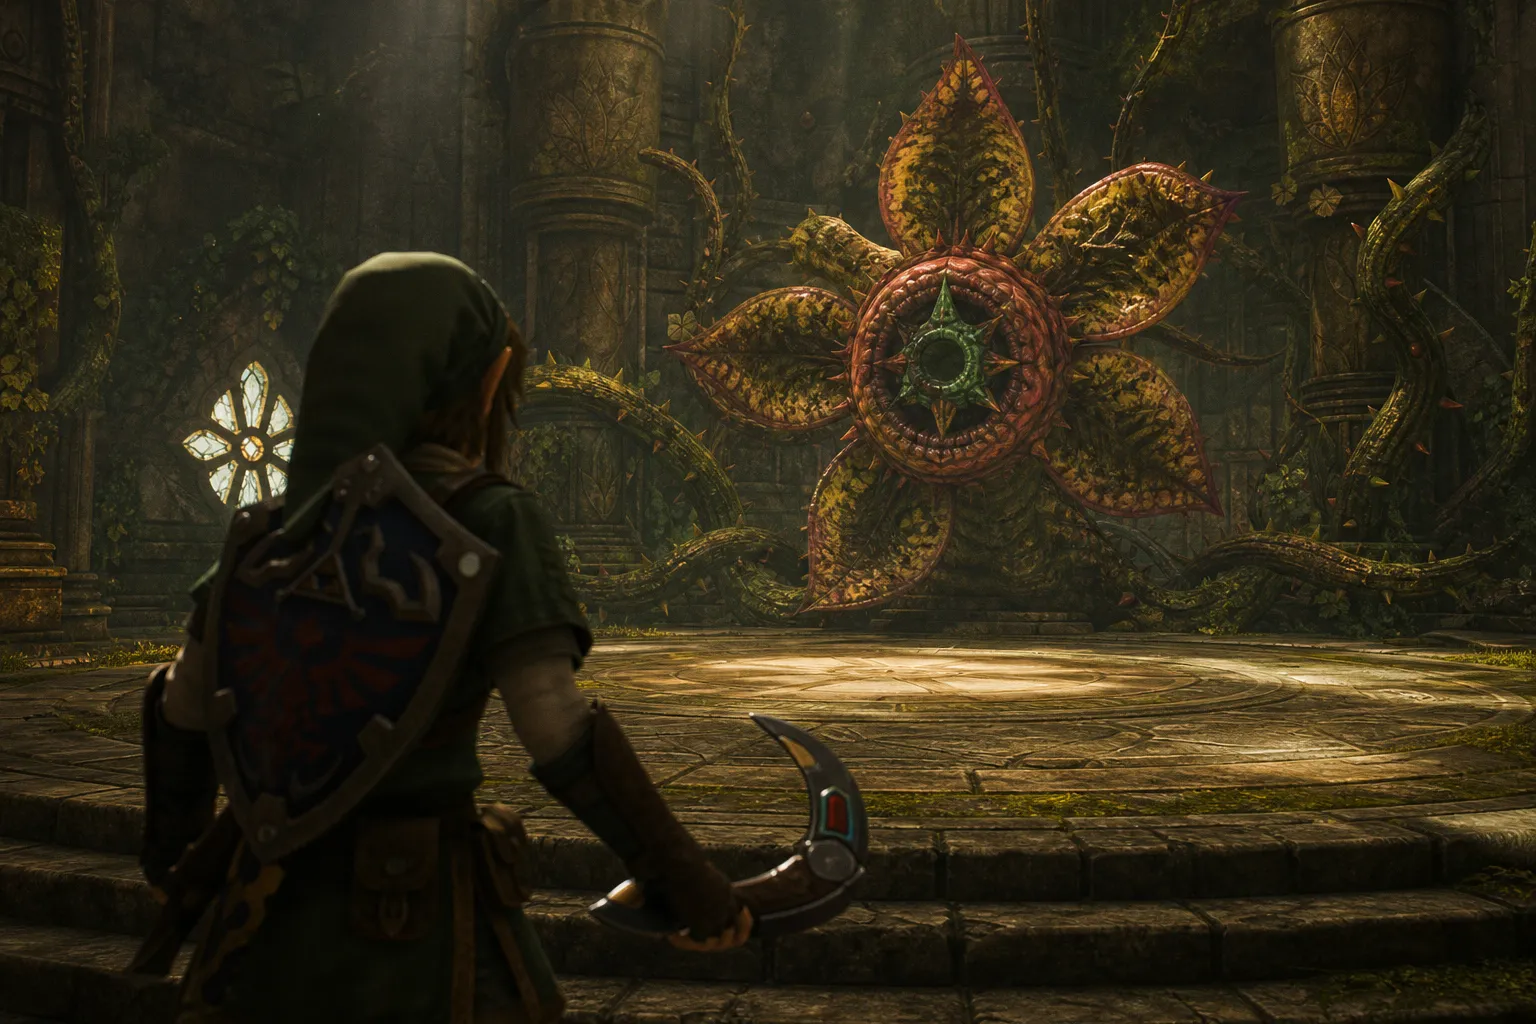
The time commitment depends on how comfortably you read Zelda puzzles. A focused first-time run through the dungeons alone can take many sessions; a replay where you already know the rooms, keys, and boss tells feels much snappier. What you will notice, though, is that Twilight Princess has a steady loop: enter a themed space, learn the dungeon’s physical language, earn the item that unlocks that language, then use it against a boss who is basically the final exam.
| Order | Dungeon | Main Progression Tool | Boss |
|---|---|---|---|
| 1 | Forest Temple | Gale Boomerang | Diababa |
| 2 | Goron Mines | Iron Boots / magnetic surfaces | Fyrus |
| 3 | Lakebed Temple | Clawshot | Morpheel |
| 4 | Arbiter’s Grounds | Spinner | Stallord |
| 5 | Snowpeak Ruins | Ball and Chain | Blizzeta |
| 6 | Temple of Time | Dominion Rod | Armogohma |
| 7 | City in the Sky | Double Clawshots | Argorok |
| 8 | Palace of Twilight | Sol-powered Master Sword | Zant |
| 9 | Hyrule Castle | Full kit | Ganondorf |
Early Game: Mastering the Forest Temple and Goron Mines
The early game is where Twilight Princess teaches you its two most important habits: look at the room before you swing wildly, and swap between Link’s forms with purpose. Human Link gives you clean item control and swordplay. Wolf Link gives you scent tracking, digging, Midna-assisted movement, and that wonderfully fast pounce rhythm. The game keeps both forms in the rotation so you do not treat one as a novelty.
1. Forest Temple: learn the dungeon loop
The Forest Temple is the first real “yes, this is Zelda” checkpoint. It is leafy, damp, and full of small distractions: monkeys to rescue, bridges to align, Deku-like plant threats, and doors that open only once you understand how the dungeon wants you to move.
Your key item here is the Gale Boomerang, and it is one of Twilight Princess’s cleanest early tools. The trick is not just throwing it. The trick is targeting multiple points in the right order. You use it to pull items, spin wind switches, redirect paths, and make the space feel more elastic. Once it clicks, the temple becomes fluid instead of fussy.
A good rhythm for the Forest Temple:
1. Rescue monkeys as you go, rather than treating them as side errands. They are part of the route, not decoration. If a gap looks too large, assume you may need monkey help later.
2. Use the Gale Boomerang on anything that looks wind-sensitive. Pinwheels, hanging objects, and distant pickups are all teaching props.
3. Clear plant hazards before solving the room. It keeps the space readable and prevents those tiny interruptions that make a puzzle feel more annoying than it is.
4. Against Diababa, think in stages. The boss is built to make you use the Gale Boomerang under pressure. Targeting and timing matter more than raw sword aggression.
Diababa is a satisfying first boss because it turns the dungeon item into a combat habit. You are not just “using the boomerang because the game says so.” You are learning that Twilight Princess bosses often have a vulnerable state you must create before your sword matters.
Twilight Princess dungeons are linear, but the rooms rarely feel flat: each one teaches a tool, then asks you to trust it when the music gets loud.
2. Goron Mines: slow down and commit to weight
Goron Mines changes the physical feel immediately. The Forest Temple is airy and vine-covered; Goron Mines is hot, metallic, and heavy. It is also where many players first realize Twilight Princess likes tactile dungeon gimmicks. You are not simply unlocking doors. You are walking on magnetized walls, dropping through water with Iron Boots, and treating weight as a puzzle mechanic.
The movement is intentionally chunkier here. Put on the Iron Boots and Link becomes deliberate, almost stubborn. That slower pace is the point. You are learning to commit to positioning: stand on the right magnetic surface, rotate your perspective, and move calmly instead of trying to rush every platform.
Typical mistakes in Goron Mines are easy to fix:
- Leaving the Iron Boots on too long. They are a tool, not a lifestyle. Toggle them off the moment you no longer need the weight.
- Ignoring ceiling and wall paths. If the room looks like a dead end, tilt your thinking vertically.
- Trying to brute-force armored enemies. Goron Mines rewards spacing and patience. Let enemies expose themselves, then strike cleanly.
- Missing how water changes your movement. The boots can pull you downward, which opens routes that normal swimming will not.
Fyrus, the boss, is a big spectacle fight with a readable loop: manage distance, use the dungeon’s item logic, and punish the opening. It looks chaotic, but the solution is more intuitive than it first appears. Twilight Princess is still being generous here. It wants you to feel brave, not lost.
Mid-Game Progression: Lakebed Temple and Arbiter’s Grounds
By the time you reach the mid-game, the tutorial softness is gone. The dungeons become more layered, the central mechanics take longer to fully reveal themselves, and the game starts asking you to hold a map in your head. This is where a zelda twilight princess game walkthrough earns its keep: not by spoiling every chest, but by keeping the order and purpose of each dungeon clear.
3. Lakebed Temple: respect the rotating staircase
Lakebed Temple is the third dungeon and one of the more mentally slippery spaces in the game. It is not difficult because the enemies are overwhelming. It is difficult because the dungeon is built around water flow, vertical movement, and a central rotating staircase that changes how rooms connect.
The Clawshot is the key item here, and it makes navigation feel snappy once you trust it. Before the Clawshot, you are reading water channels and door access. After the Clawshot, your eyes start scanning for targets on walls and ceilings. That shift is pure Twilight Princess: the same rooms suddenly feel more open because your tool vocabulary expanded.
The clean way to approach Lakebed Temple is to treat the central chamber as your anchor. Whenever you feel turned around, return mentally to the staircase and ask what changed. Did water start flowing? Did a path open? Can you now reach a target that was previously just background detail?
| Lakebed Problem | What It Usually Means | Your Best Response |
|---|---|---|
| You keep circling the same rooms | The staircase or water route has not been redirected | Revisit the central chamber and change the flow |
| A chest appears reachable but isn’t | You likely need the Clawshot angle later | Mark it mentally and keep progressing |
| Underwater movement feels clumsy | You are fighting the dungeon’s pacing | Slow down, surface when possible, and use clearer camera angles |
| Morpheel feels hard to track | The fight is about positioning before damage | Stay calm, watch the body, and close in when the opening appears |
Morpheel, the Lakebed boss, is memorable because it pulls you into a larger underwater arena and asks you to keep your bearings while the target moves around you. The Clawshot matters here, but so does composure. If you panic and chase blindly, the fight feels muddy. If you watch the boss’s movement and close distance at the right moments, it becomes surprisingly smooth.
4. Arbiter’s Grounds: follow the undead logic
Arbiter’s Grounds is where Twilight Princess gets dusty, eerie, and more aggressive with atmosphere. The dungeon is built around haunted prison energy: sand traps, undead enemies, ghostly progression, and spaces that feel dry and dangerous. It is a tonal snap after Lakebed Temple, and I love how confidently the game shifts from water machinery to desert ruin.
The main item is the Spinner, which may be one of the strangest and most delightful Zelda tools. It is not an all-purpose movement upgrade; it is a dungeon-specific ride with a very particular feel. You latch onto rails, launch across gaps, and suddenly the dungeon has this sharp, arcade-like pulse.
The boss, Stallord, is the perfect payoff. The fight is fast, bony, and surprisingly readable. You ride, dodge, strike, and repeat. If Forest Temple teaches item targeting and Lakebed teaches spatial patience, Arbiter’s Grounds teaches momentum. You will notice the best moments happen when you stop overcorrecting and let the Spinner carry you along its intended line.
The Mansion Mystery: Navigating Snowpeak Ruins
5. Snowpeak Ruins: the dungeon that pretends not to be one
Snowpeak Ruins is the oddball, and I mean that as praise. Instead of another temple with a sacred layout, you get a mansion buried in snow, inhabited by yeti characters, with progression tied to searching rooms and collecting ingredients for soup. It is still absolutely a dungeon. It has keys, hazards, item gating, and a boss. But the wrapper is softer, stranger, and more domestic.
That soup is not a cute extra detail. It restores health and supports the dungeon’s progression, turning the mansion into a place that feels lived-in rather than merely conquered. The loop is different: you are not just asking, “Where is the next locked door?” You are also asking, “What room does this clue point toward, and what ingredient moves the household story forward?”
The Ball and Chain is the standout tool here. It feels heavy in a way that matches the dungeon perfectly. You smash ice, break barriers, and handle armored threats with a satisfying thud. It is not elegant, but it is wonderfully direct. After several dungeons built around flow, hooks, and rails, Snowpeak gives you a blunt instrument and says: yes, now break the frozen thing.
A smart Snowpeak route mindset:
1. Treat the mansion map like a house, not a temple grid. Bedrooms, storage areas, courtyards, and corridors have a more grounded logic.
2. Pay attention to ingredient clues. They point the way without making the dungeon feel like a standard key hunt.
3. Use soup as a safety net. If you are taking chip damage from ice enemies, do not stubbornly limp through the whole place.
4. Swing the Ball and Chain deliberately. It is powerful, but the wind-up asks for timing. Give yourself room.
5. Expect the warm tone to turn sharp. Snowpeak’s boss setup is one of the game’s better emotional pivots.
Blizzeta, the boss, plays beautifully off the dungeon’s icy theme. It is less about nonstop attacking and more about reading the arena, avoiding the dangerous drops, and punishing the right opening. Snowpeak Ruins is a great reminder that dungeon design does not need to look like a temple to behave like one.
Snowpeak Ruins works because it changes the flavor without breaking the rules: you still solve, unlock, earn, and fight, but the mansion makes the loop feel fresh.
Late Game Challenges: Temple of Time and City in the Sky
The late game leans into spectacle and precision. Your inventory is now broad enough that Twilight Princess can layer old habits with new ones. This is also where the pacing starts to feel more like a climb toward the end rather than a tour through separate regions.
If you also follow competitive games between adventure sessions, a quick glance at esports results and match schedules scratches a similar part of the brain: routes, matchups, timing, and the small decisions that decide whether a run feels clean or messy.
6. Temple of Time: command the statue, then clear the path
Temple of Time has a crisp, almost ceremonial feel. It is cleaner than Arbiter’s Grounds, less cozy than Snowpeak, and much more focused on controlled puzzle movement. Its major tool, the Dominion Rod, lets you command certain statues, and that changes the whole tempo of the dungeon.
Instead of asking, “How do I get Link across?” the dungeon often asks, “How do I move this object through the space so Link can benefit from it?” That distinction matters. The Dominion Rod puzzles are about escorting weight and power through a route. You clear obstacles, reposition statues, and think a few steps ahead.
The most satisfying part is how the dungeon makes you reverse your thinking. Moving forward is only half the job. Once you gain control of the statue, you may need to guide it back through spaces you already crossed, now seeing those rooms with a different purpose. That is a classic Zelda trick, and Twilight Princess handles it with a nice, steady confidence.
Armogohma, the boss, uses the dungeon’s logic in a big readable arena. Keep your eyes up, watch the movement, and use the tools the temple has trained into your hands. It is not the most emotionally dramatic fight in the game, but it is a solid mechanical exam.
7. City in the Sky: learn to trust the air
City in the Sky can feel awkward at first because it is meant to. The place is windy, broken, and vertical. Bridges are unreliable. Gaps are everywhere. The local creatures and architecture make the whole dungeon feel like it is suspended one bad step away from disaster.
Then the Double Clawshots arrive, and the entire dungeon wakes up.
This is one of the best item upgrades in Twilight Princess because it changes movement from “reach a target” to “chain a route.” You are no longer using one hook to pull yourself to one point. You are linking targets, hanging, turning, and launching again. When the rhythm lands, it feels fluid and almost acrobatic.
For City in the Sky, your main job is to look before you leap. The dungeon loves hiding the next target just outside your first camera angle. Pause, rotate the view, and search high and low. The Double Clawshots reward curiosity more than speed.
Argorok, the boss, is a natural finale for this dungeon’s movement style. It is aerial, dramatic, and built around vertical pursuit. The fight wants you to use the Double Clawshots with confidence, climbing through the arena and striking when the boss is exposed. If you have been timid with the item, Argorok forces you to loosen up.
Final Descent: The Palace of Twilight and Hyrule Castle
The final stretch narrows the focus. You have seen forests, mines, lakes, deserts, mansions, ancient halls, and sky ruins. Now Twilight Princess turns toward its own title: twilight, corruption, and the last confrontation in Hyrule.
8. Palace of Twilight: power the Master Sword with Sol
The Palace of Twilight is the penultimate dungeon, and it has a distinct pressure. It is not just another themed location; it feels like you are entering the source of the game’s strange shadow language. The major progression revolves around the Sol, which powers the Master Sword and lets you push deeper into the palace.
The Sol sections have a different kind of tension. You carry light through hostile space, and the dungeon responds to that light. The Master Sword upgrade is not just a stat bump in spirit; it is the game turning your central weapon into the correct answer for the realm you are invading.
Zant is the boss here, and the fight works almost like a remix. It pulls from previous ideas and asks you to stay adaptable. That is the right kind of late-game test. You are not learning from zero anymore. You are proving that the full journey has stuck: movement, item use, spacing, and quick recognition.
A simple Palace of Twilight mindset:
- Protect the Sol route first. Do not rush into combat if the real objective is moving light through the room.
- Use the powered Master Sword intentionally. The dungeon is built around its new role.
- Expect Zant to change the rules quickly. Stay loose. The fight is less about one perfect trick and more about recognizing each phase.
9. Hyrule Castle: the full-kit finale
Hyrule Castle is the ninth and final main dungeon. By this point, Twilight Princess has given you the full tour of its item design, and the castle acts like a final sorting ground. It is not built around one new tool in the same way as the earlier dungeons. Instead, it asks whether you can move through combat, navigation, and set-piece pressure with the confidence you have earned.
This is where I recommend playing a little more slowly than your nerves want you to. Final dungeons can make players rush because the end is visible. Resist that. Check your resources, stay aware of enemy placement, and let the castle’s pacing do its work. Twilight Princess wants the finale to feel grand, not sloppy.
Ganondorf is the closing confrontation, and the fight carries the weight you would expect. Mechanically, it is a culmination: sword control, timing, movement, and calm under pressure. You do not need secret knowledge to finish it. You need the habits the previous eight dungeons have been building all along.
The Clean Dungeon Order, With Practical Focus
If you want the compact version of this zelda twilight princess game walkthrough, keep this order nearby and use the “focus” column as your mental note before entering each dungeon.
| # | Dungeon | Focus Before You Enter |
|---|---|---|
| 1 | Forest Temple | Learn Gale Boomerang targeting and rescue-based progression |
| 2 | Goron Mines | Use Iron Boots for weight, magnets, and underwater positioning |
| 3 | Lakebed Temple | Track water flow and the rotating staircase carefully |
| 4 | Arbiter’s Grounds | Follow ghostly progression and master Spinner momentum |
| 5 | Snowpeak Ruins | Read mansion clues, gather soup ingredients, break ice with force |
| 6 | Temple of Time | Think in terms of moving statues through solved spaces |
| 7 | City in the Sky | Chain Double Clawshot targets and scan vertically |
| 8 | Palace of Twilight | Carry Sol light and use the powered Master Sword |
| 9 | Hyrule Castle | Bring every habit together for the final push |
One thing worth making plain: these dungeons are not meant to be completed in any order. Twilight Princess is linear at the main-dungeon level. That is not a weakness. It is why the progression feels so polished. Each item arrives when the game is ready to build around it, and each boss lands after you have been trained to understand the trick.
Final advice before you start the run
Twilight Princess is at its best when you let each dungeon teach you its texture. Forest Temple is breezy and target-driven. Goron Mines is weighty. Lakebed Temple is rotational and wet. Arbiter’s Grounds is momentum in a haunted shell. Snowpeak Ruins is warm, weird, and icy. Temple of Time is controlled. City in the Sky is airy and chained together. Palace of Twilight is about carrying light into hostile dark. Hyrule Castle is the final exam.
If you want similar browser-friendly guide energy after this, I would point you toward route-based adventure walkthroughs, puzzle-room breakdowns, and boss guides where the goal is not to show off, but to make the next step feel obvious. That is the sweet spot: no gatekeeping, no overcomplication, just a clean path through a big game that still has plenty of room to surprise you.